
To any budding Night City psychopath, there’s something undeniably satisfying about pummeling opponents to death with metal-reinforced limbs. It’s a very “hands-on” approach that, while overshadowed by flashing Katana-wielding or stylish gunslinging, turns out to be one of the single most-OP melee builds in all of Cyberpunk 2077 and has the added bonus of being one of the quickest and simplest to perk for. All of your necessary skills will make use of the Body Attribute and, predictably, the Athletics and Street Brawler skill tree. If you’re looking to become a straight-up cyber-hulk, this is how you do it.
Cyberpunk 2077 Melee Build: King Kong’s Gorilla Arms Build
Not only does this build do immense, literally stunning damage to opponents with your bare hands (so to speak), you are also a beast of a tank capable of taking on pretty much the entire NCPD police force alone. Immune to poison, bleeding, and burns and sporting some of the most ridiculous sustain, heals, and an enormous pool of HP, this King Kong gorilla arms melee build is enough to make any furious, overpowered ape smile.
Weapons
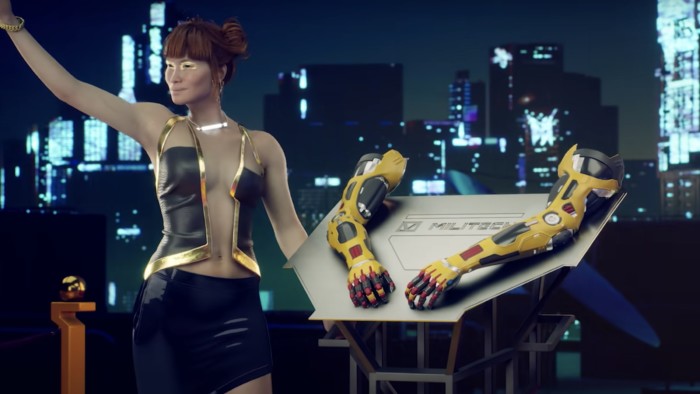
Gorilla Arms (Legendary)
This build is centered around using the Gorilla arms to utterly manhandle opponents. Not only are fisticuffs a perfectly viable method of destroying opponents, it’s surprisingly OP — if not outright broken — when built for it accordingly. Fists receive all the benefits of your blunt weapons perks, including the multiple stun-related bonuses.
You’re going to want to run your basic Rare variant of Gorilla Arms for a while, building out most of the rest of the build before even thinking of dropping 100,000 eddies on the Legendary rarity.
Remember to get your gorilla-hands on the Animals Knuckles and Black Market battery, they are critical components of transitioning yourself from knockout artist to straight-up killing machine.
Cyberware
Circulatory System
1) Blood Pump ($5,000-$35,000)
Can be activated to restore 50-90% of your health (180-second cooldown). A massive heal that will serve you well until you can afford the Legendary-rarity Biomonitor which it is eventually outperformed by.
OR
1) Biomonitor ($6,000-$42,000)
Automatically restores 30-100% of your health when it drops below 15%. This could ostensibly be swapped out for Blood Pump, which is cheaper at lower levels.
2) Second Heart ($42,000)
Revives you to full health when your HP hits zero (300-second cooldown). This is the ultimate failsafe after Biomonitor has already rescued you. If you, despite all of the wild tankiness you get as part of this melee build, still end up flatlined then you’re doing something wrong.
3) Adrenaline Booster ($4,000-$28,000)
Restores 10-50% of your stamina upon killing an enemy. Can be swapped out to use Biomonitor and Blood Pump in the same build for easy immortality.
Immune System
Detoxifier ($12,000)
A simple, (comparatively) cheap way to immunize yourself against poison.
Interaugmentary System
Subdermal Weave ($12,000)
Grants full immunity against bleeding
Fireproof Coating ($12,000)
Grants fully immunity against burning.
Subdermal Armor ($2,000-$14,000)
Boosts armor by 20-200, adding some extra tankiness.
Operating System
Militech Berserk ($43,750) (recommended)
Can be activated for a 10% and 15% boost to Armor and Melee damage respectively (alongside weapon sway reduction), a 40% increase to max-Health/Stamina, and 5% health restoration upon kill. Though some of the other Operating Systems.
OR
Zetatech Berserk (Iconic-Only) ($43,750)
Increases armor, melee damage, and resistances by 20% for 10 seconds and creates a shockwave on impact when descending from a great height (cooldown: 30 seconds.) The shockwave and short but intense boost to damage are a potent way to start a fight, but with you already immune to poison, burn, and bleeding the resistance bonus feels wasteful — especially since the shockwave essentially requires the insanely expensive Reinforced Tendons or Fortified Ankles to become consistently useful. That said, it’s fun for those in the late-game looking to roleplay as a superhero.
Skeleton
Synaptic Signal Optimizer ($4,000-$28,000)
Gives you a tremendous 20-60% bonus to your max health, only furthering your already-insane tankiness.
Dense Marrow (Epic Only) ($10,000)
Dense Marrow’s epic variety, the only one you want, ups melee damage by a full 25% at the cost of a 10% increased stamina cost to strong attacks. With Adrenaline Booster, this tradeoff is essentially nullified, giving you a free 25% damage boost.
Perks
While it might be tempting, building for extra tankiness through the Juggernaut and Human Fortress perks is recommended against in this melee build. This is because of the incredibly OP Payback perk which increases your damage immensely as your health reduces. The Rush perk, which gives a pretty ridiculous amount of HP back for every blow is more than enough to keep your health up through sheer offense, making it a waste of perks to invest in Juggernaut or Human Fortress. You should never be sitting and blocking with Gorilla Arms — instead you should be charging straight at enemies and dismantling them by hand without pause.
Body
The main layout of skills for the King Kong build prioritizes the synergy between Rush and Payback and recommends against putting any points into the block-related perks — Juggernaut and Human Fortress — until you have 18 points in Body and can unlock Biding Time.
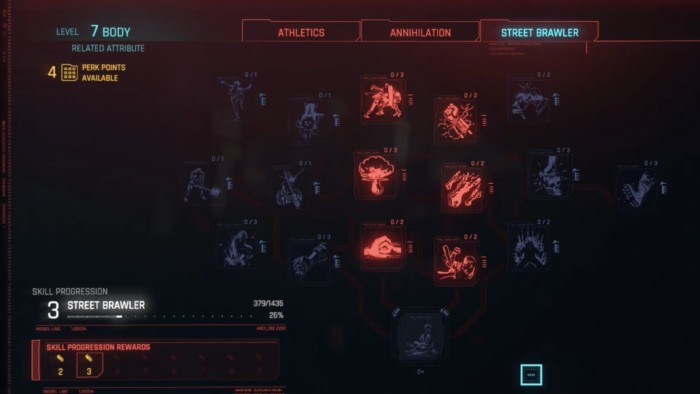
Street Brawler
Crushing Blows 3/3 (0) – Increases damage from strong attacks by 50%. This synergizes especially well with Gorilla Arms, even more so than held weapons, and their devastating charge attack. A critical component to any melee build, but more so than any a Gorilla Arms build.
Dazed 2/2 (4) – All attacks with blunt weapons have a 30% chance of causing Stun.
Rush 2/2 (6) – Restores 5% of HP over 2 seconds for every successful strike with a blunt weapon. This is the perk that really turns blunt weapons broken, and the fact that you can obtain it at perk level 6 is somewhat ridiculous — so take advantage.
Opportune Strike 1/1 (8) – Increases damage against stunned enemies by 50%.
Flurry 3/3 (0) – Increases combo damage with blunt weapons by 50%.
Efficient Blows 2/2 (6) – Reduces the stamina cost of strong attacks with blunt weapons by 50% — a critical component of any melee build, but especially important here for the emphasis on charged, strong attacks when wielding Gorilla Arms.
Payback 3/3 (10) – Increases damage dealt with blunt weapons by a staggering 3% for every 1% of health missing. Without any cap, this means that even dipping to 70% almost doubles your attack damage.
Thrash 1/1 (15) – Strong attacks with blunt weapons reduce the target’s armor by 30% for 10 seconds.
Frenzy 1/1 (15) – Doubles your blunt-weapon damage for 10 seconds after defeating an enemy.
Unshakable 3/3 (18) – Restores 15% of Health and Stamina for every successful blunt weapon attack on a stunned enemy.
Guerilla 1/1 (20) – Increases Crit Damage by 60% (+2% per Perk Level) for 10 seconds upon entering combat.
Athletics
Regeneration 1/1 (0) – Unlocks in-combat health regen. Slow, but is buffed through other perks. The important
Invincible 3/3 (5) – Increases max health by 30% — exactly the kind of tankiness you want, as opposed to blocking buffs.
Steel and Chrome 2/2 (9) – Deal 20% more damage with melee weapons. An obvious necessity for any melee build, let alone a Gorilla Arms build.
Like a Butterfly 1/1 (11) – Negates the stamina cost of dodging — letting you save it all for strong/charged attacks.
Cardio Cure 1/1 (12) – Health regenerates 25% faster while you move.
Marathoner 1/1 (14) – Sprinting no longer costs stamina. Again, helps save stamina for strong and charged attacks with your Gorilla arms.
Dog of War 2/2 (16) – Increases in-combat health regen by 20%
Steel Shell 1/1 (18) – Increases total armor by a flat 10%.
Hard Motherfucker 1/1 (20) – An important skill for making sure you can’t get cut down before closing in. You won’t have mantis blades as a gap closer, so having just enough tankiness to get in close and make use of the Rush/Payback synergy is important.